Manual customization configurator pCon
From a whiteboard that needs to be just 2 inches smaller to creating a whiteboard with a unique design as an eye catcher in a room. Once you have added the Chameleon data in pCon, you will find the ‘Custom whiteboard wall’ within the whiteboard walls category. This product allows you to build a whiteboard completely according to your wishes.
Below we explain in a few steps how this configurator works.
All options and features can be found in our digital documentation folder.
Unique configurator in pCon.planner
From a whiteboard that needs to be just 2 inches smaller to creating a whiteboard with a unique design as an eye catcher in a room. Once you have added the Chameleon data in pCon, you will find the ‘Custom whiteboard wall’ within the whiteboard walls category. This product allows you to build a whiteboard completely according to your wishes.
Below we explain in a few steps how this configurator works.
All options and features can be found in our digital documentation folder.
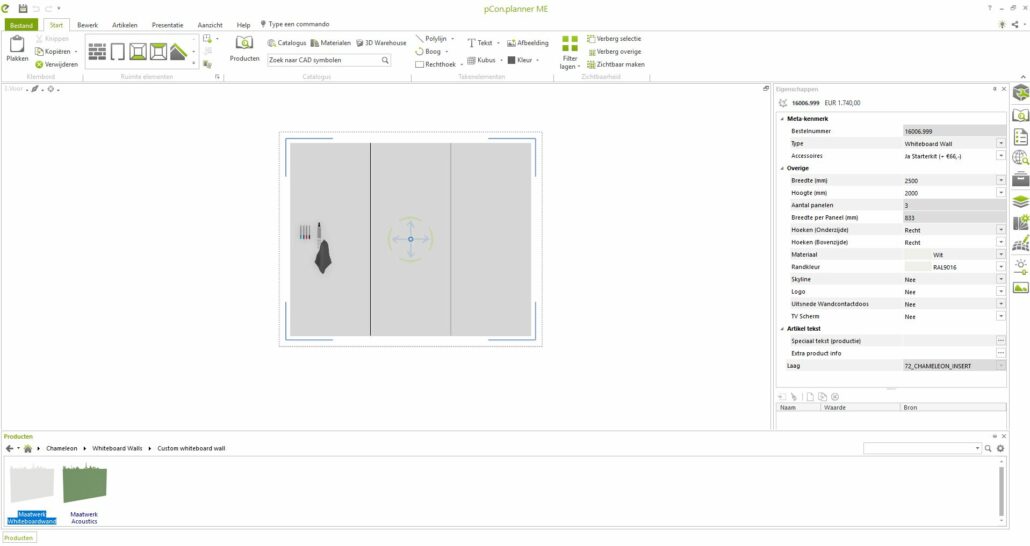
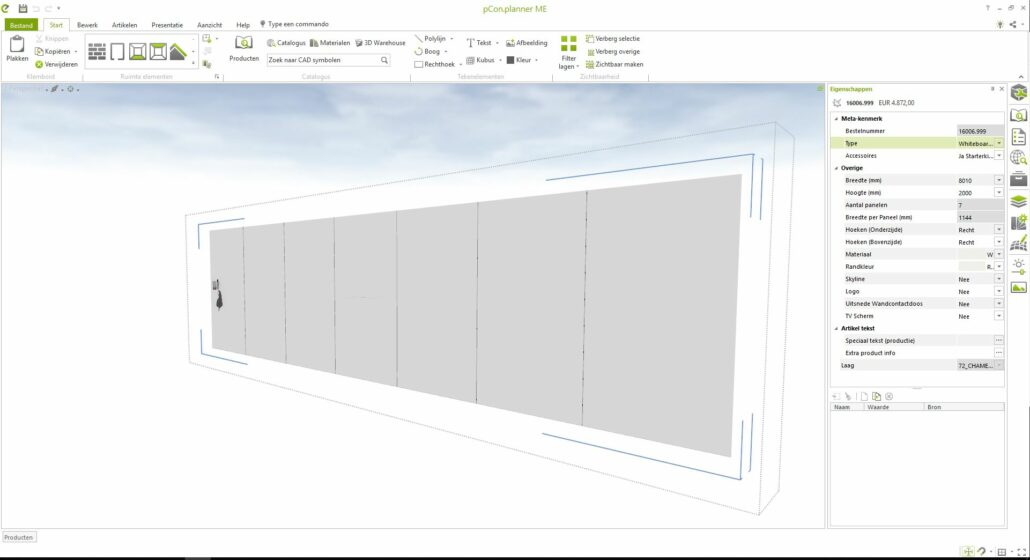
Step 1: select the product ‘custom whiteboard wall’.
A ‘deafault’ whiteboard of 3 panels with a dimension of 2500 x 2000 mm will appear. From this base you can start making your own modifications.
Step 2: A whiteboard 8.01 meters wide? You can!
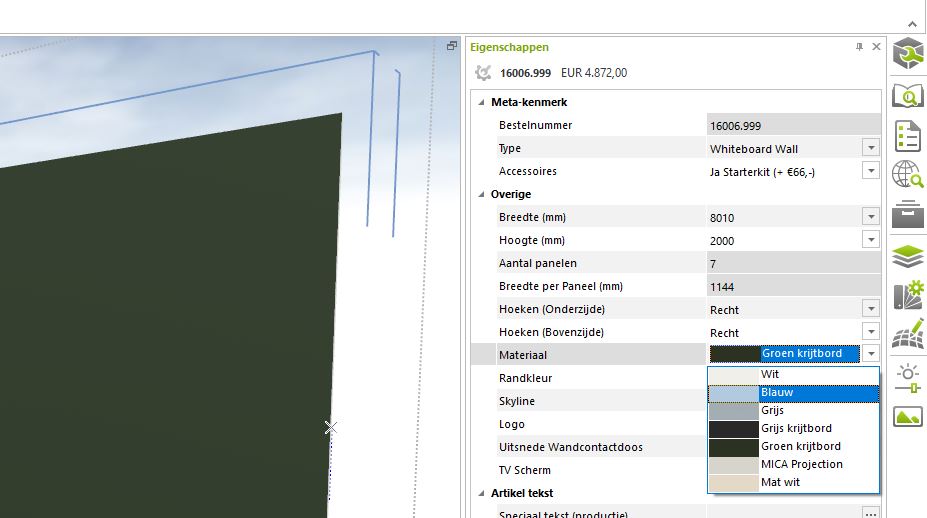
Step 3: Choose the (surface) material
Chameleon offers 5 different surfaces for different functionalities. All surfaces contain enamel steel with a lifetime guarantee on writing and erasure.
- White: this is the most common whiteboard surface for whiteboard markers.
- Gray and Green Chalkboard: suitable for chalk instead of whiteboard markers.
- Low Gloss and Projection: 2 surfaces suitable in combination with projectors.
(The different surfaces have different maximum panel widths. That is why you will see the seams staggered).
Would you like to receive samples to make a better choice? Request our sample folder here.
Step 4: Options for your own design
In the configurator, you have several options to design the whiteboard to your liking. For some options there is an additional charge, which you will see added to the total price.
- Add your customer’s logo: in pCon you will see the Chameleon logo appear in the board. In reality, you can have any logo incorporated into the board. The outline of the logo will be cut out of the board, behind which a full-color sheet will be visible. You can send us the logo with the quote request.
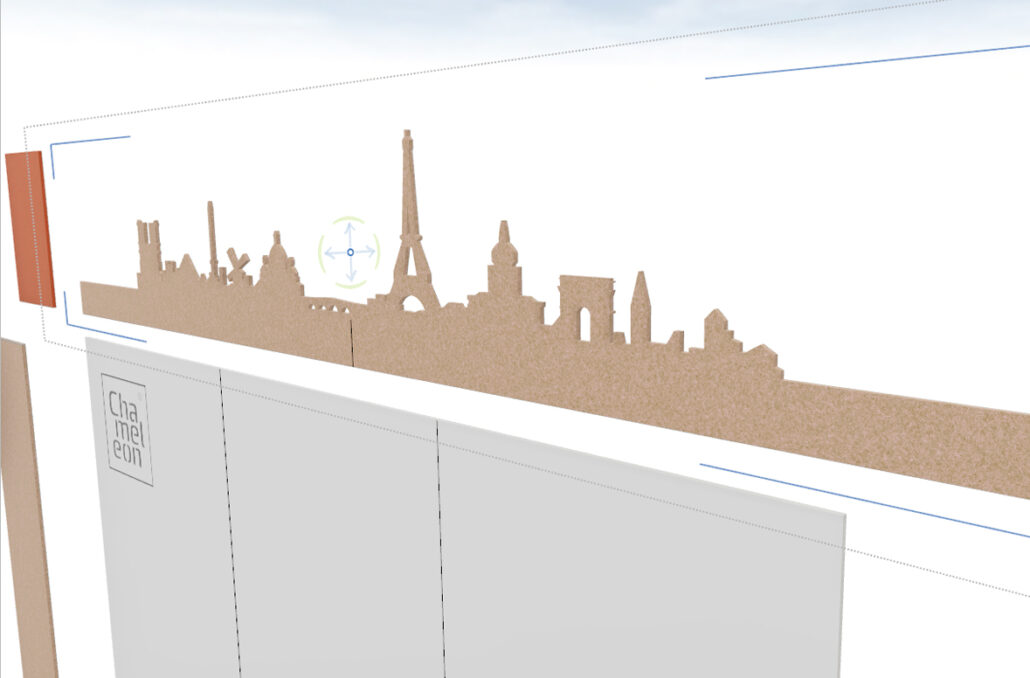
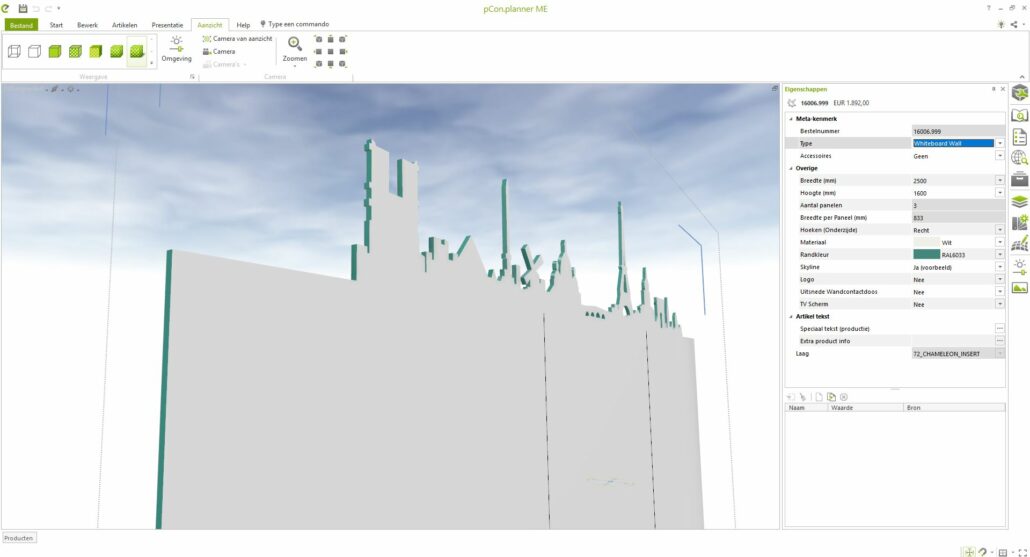
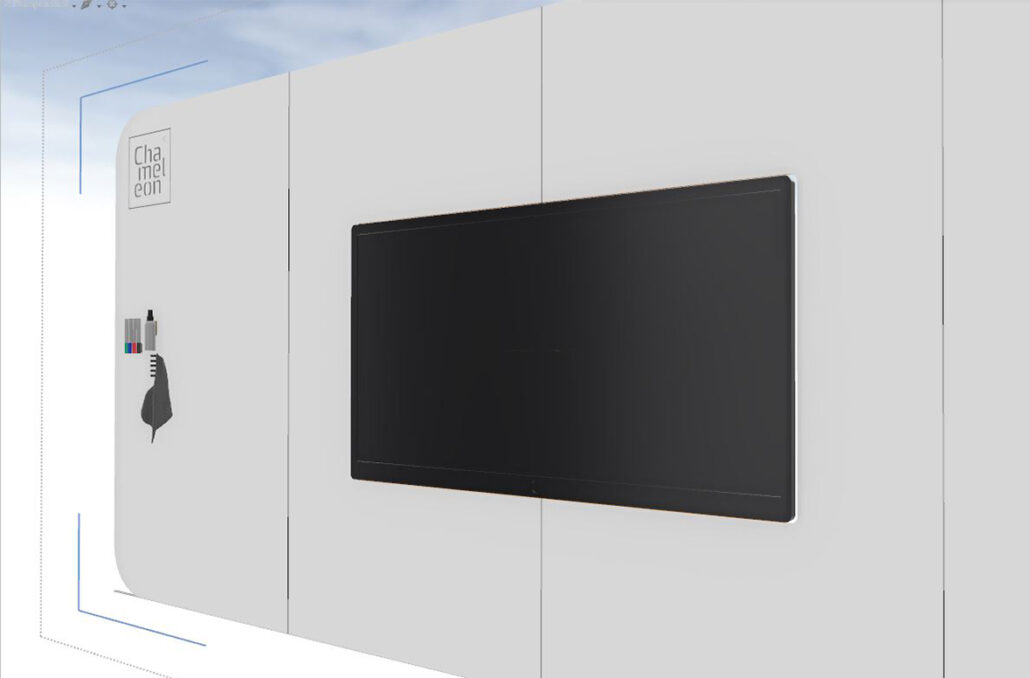
- Skyline or cut-out for TV screen or wall sockets: in the pCon design a default cut-out will be visible. In reality, you can have almost any cut-out produced by us. We will contact you about this.
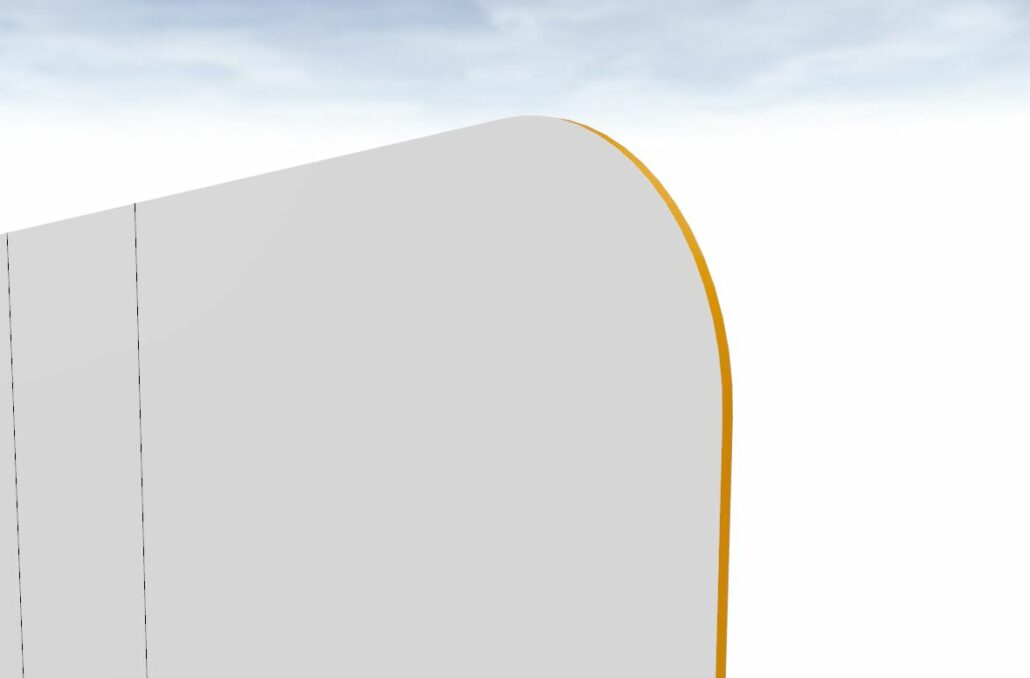
- Rounded corners: determine the radius of the top corners and bottom corners yourself.
- Colored edge: for projects over 50m2 surface area (multiple whiteboards), you have the option of adding your own RAL color to a whiteboard.
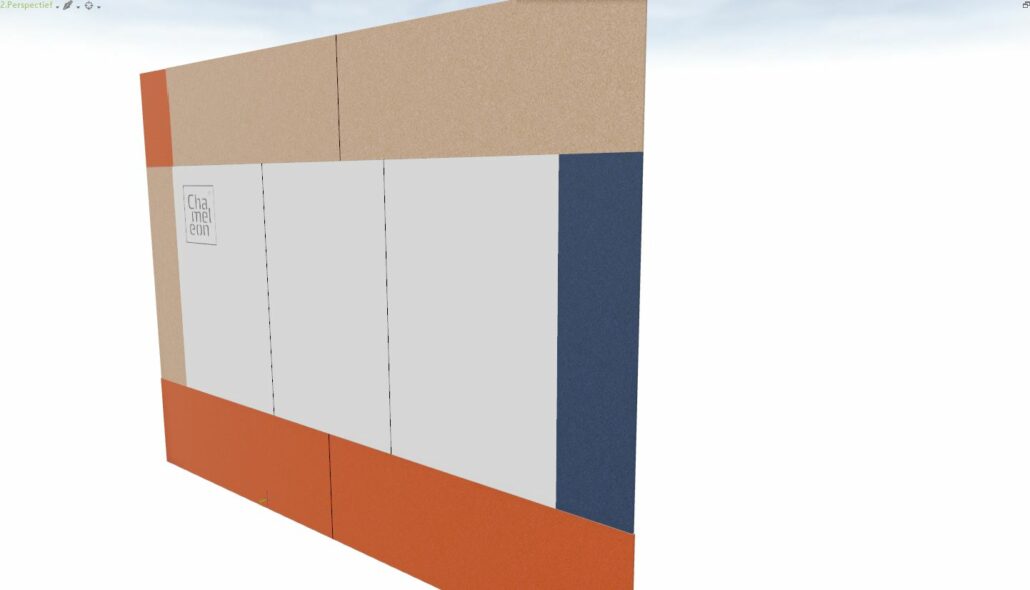
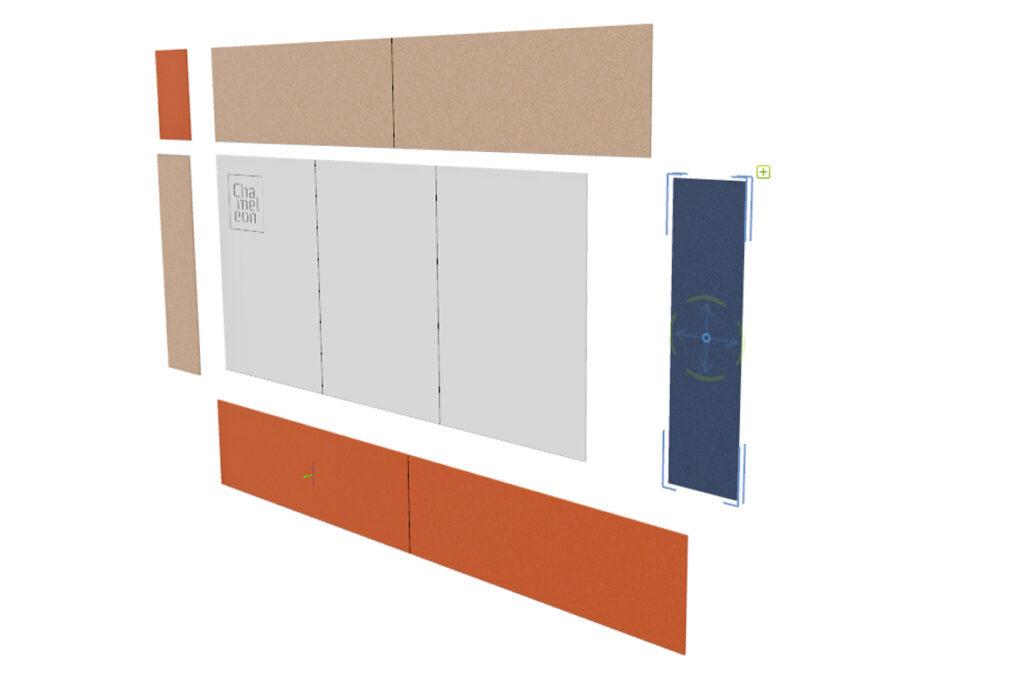
Step 5: The combination with acoustic panels
In addition to a Custom Whiteboard Wall, you can combine with Custom Acoustics. This is a separate product with its own selection choices. With the 2 products together, you build your own wall surface with writing and acoustic functionality.
- Each surface or colour is formed by a new product.
- Place the products against each other to form one unit.
- The acoustic panels can also be provided with cut-outs.